To send a marketing email through a workflows, you must create and save the email for automation. Using the email tool, you can create automated emails using either the standard editor or the drag and drop editor. You can also create automated emails
Create automated emails in the email editor
- Regular editor: Go to Marketing -> Email -> In the upper right, click Create email.
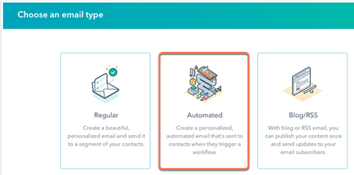
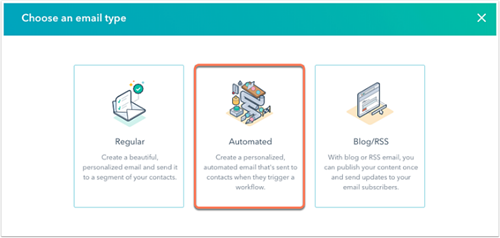
- In the dialog box, select Automated
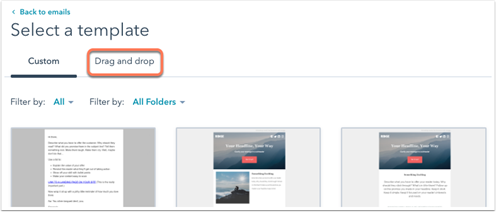
- Select a template
- In the dialog box, enter an Email name and click Create email.
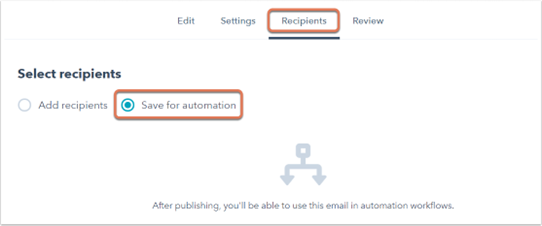
- After composing and setting up the email, click the Recipients tab.
- Under ‘Select recipients’, ensure that Save for automation is selected.
- In the upper right, click Next and review your email settings.
- In the upper right, click Save for automation to publish the automated email.
Once the automated email is published, it will be available for selection in the Send email action in workflows.
Create automated emails in the drag and drop editor
- Go to Marketing -> Email, in the upper right click Create email.
- In the dialog box, select Automated.
- Click the Drag and drop tab, then select a template.
- After composing and setting up your email, click the Send tab and ensure that the email is set as automated. To switch the email type between regular and automated, click the Actions dropdown menu in the upper right, then select Convert.

- To publish the email, in the upper right, click Review and save.In the right panel, click Save for automation.
- Once the automated email is published, it will be available for selection in the Send emailaction in workflows.
Create automated emails in the in the workflow editor
You can create a simple automated email from within the workflow editor itself. Emails created in the workflows tool will have a basic appearance, but can be customized further in the email editor.
- Go to Automation -> Workflows.
- Click the name of an existing workflow/create a new workflow.
- In the workflow editor, click the plus icon + to add a workflow action.
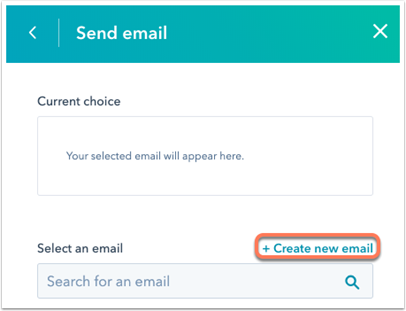
- In the right panel, select the Send email

- Click + Create new email.
- In the right panel, enter the details of your email. To further customize the email, click the email toollink at the top of the panel.
- After composing your email, click Save email at the bottom of the right panel.
- After saving your email, you can select it for use in any workflow.
- You can also access it from your email dashboard for further editing.